

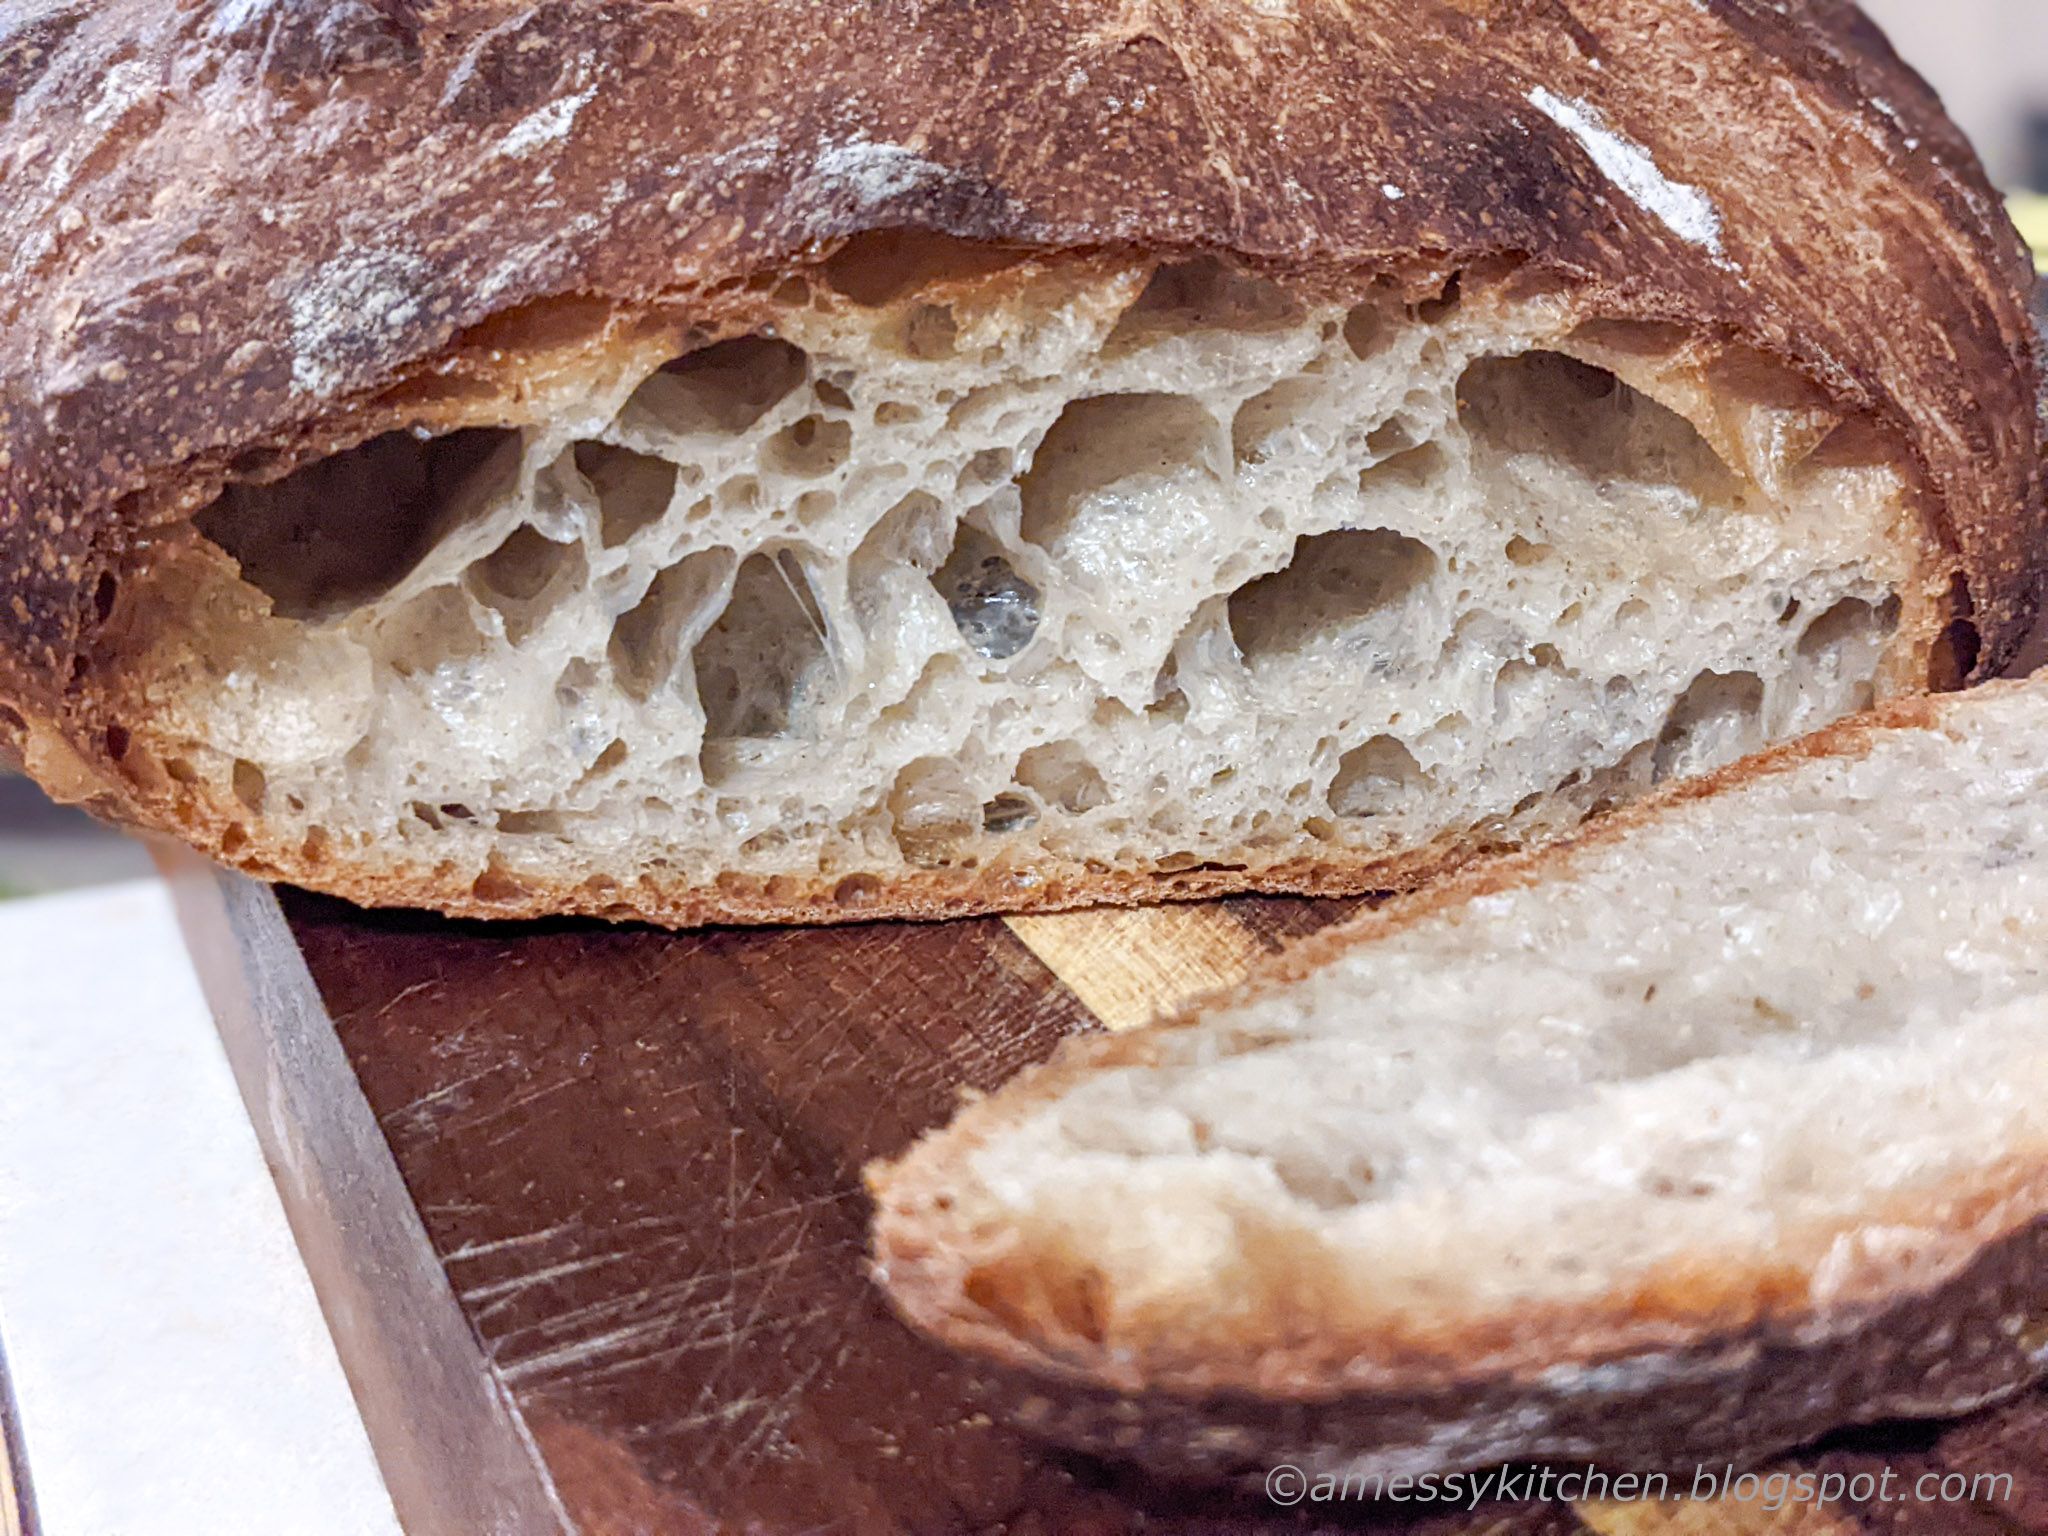
This bread has an absolutely enticing, wheaty aroma during and after baking, and the crumb is fantastically chewy and bouncy. The process of working up to a higher hydration worked very well for me this time and the timeline is so flexible, I venture to call this an easier challenging bread. Granted, I did have the good bread flour this time but as Galician flour is soft wheat, which is lower protein, I suspect the method is what is the most impactful. Bottom line: I would make this one again!
We would love to have you try out this Spanish specialty with us this month and share how it turned
out! New recipes are posted every month on the 16th. Check out our Facebook group
to see the participants' baking results during that time. If you would
like to post your results with a Buddy badge on a blog, let us know in
the comments or on the Facebook page.
Pan Gallego – Bread of Galicia
Adapted from New World Sourdough by Bryan Ford
Makes: 1 large loaf
Levain:
10g mature sourdough starter (mine was unfed and cold)
20g bread flour
10g whole grain rye flour (I used fresh ground)
15g whole wheat flour (I used fresh ground durum wheat)
45g warm water
Final Dough
425g bread flour (or mix of bread flour & all-purpose flour) (I used King Arthur bread flour)
75g rye flour (I used fresh ground)
400-425g water (more if needed) (I used 450g total)
100g levain (all of it)
10g sea salt
Build the Levain:
In a small bowl, mix the starter (it can be cold from the fridge), flours, and warm water until fully incorporated. Cover and let rest at warm room temperature for 3 to 4 hours, or until doubled in size. Use the levain immediately, or refrigerate it for 12 hours to use later. (I let mine sit out all day until it was quite puffy and doubled.)
Day 1 - Mix the Final Dough
The key to hand mixing high hydration dough is to add the water as slowly as possible. For this bread, we use room temperature water as opposed to the cold water used for the glass bread.
Place the flours in a large bowl or dough bucket. Pour in 325 grams of water and mix thoroughly. Add 25-50 grams more water, a little at a time, until you have a wet, sticky dough. Let rest 45 min. (I added a full 400g water and was left with a nicely hydrated dough that I let autolyse all day while the levain woke up.)
Add the levain and 25 grams water. Fold in the water and levain until fully incorporated. Let rest for 1 hour.
Add the salt and 15-25 grams water. Using your fingers, squish and squeeze the salt and water into the dough until you have a smooth surface.
Complete a total of two stretch and folds every 30 minutes. (After the first couple stretch and folds, I used the coil fold method right in my bucket for the bulk fermentation.) To perform coil method, lift up the dough with wet hands until each side pulls up and tucks under, letting it fold under on itself in thirds, then rotate 90 degrees, and repeat withe adjacent sides.
Let the dough bulk ferment for 4 hours. (This is when I used the coil folds each hour.) The dough should be smooth and have a bubbly surface.
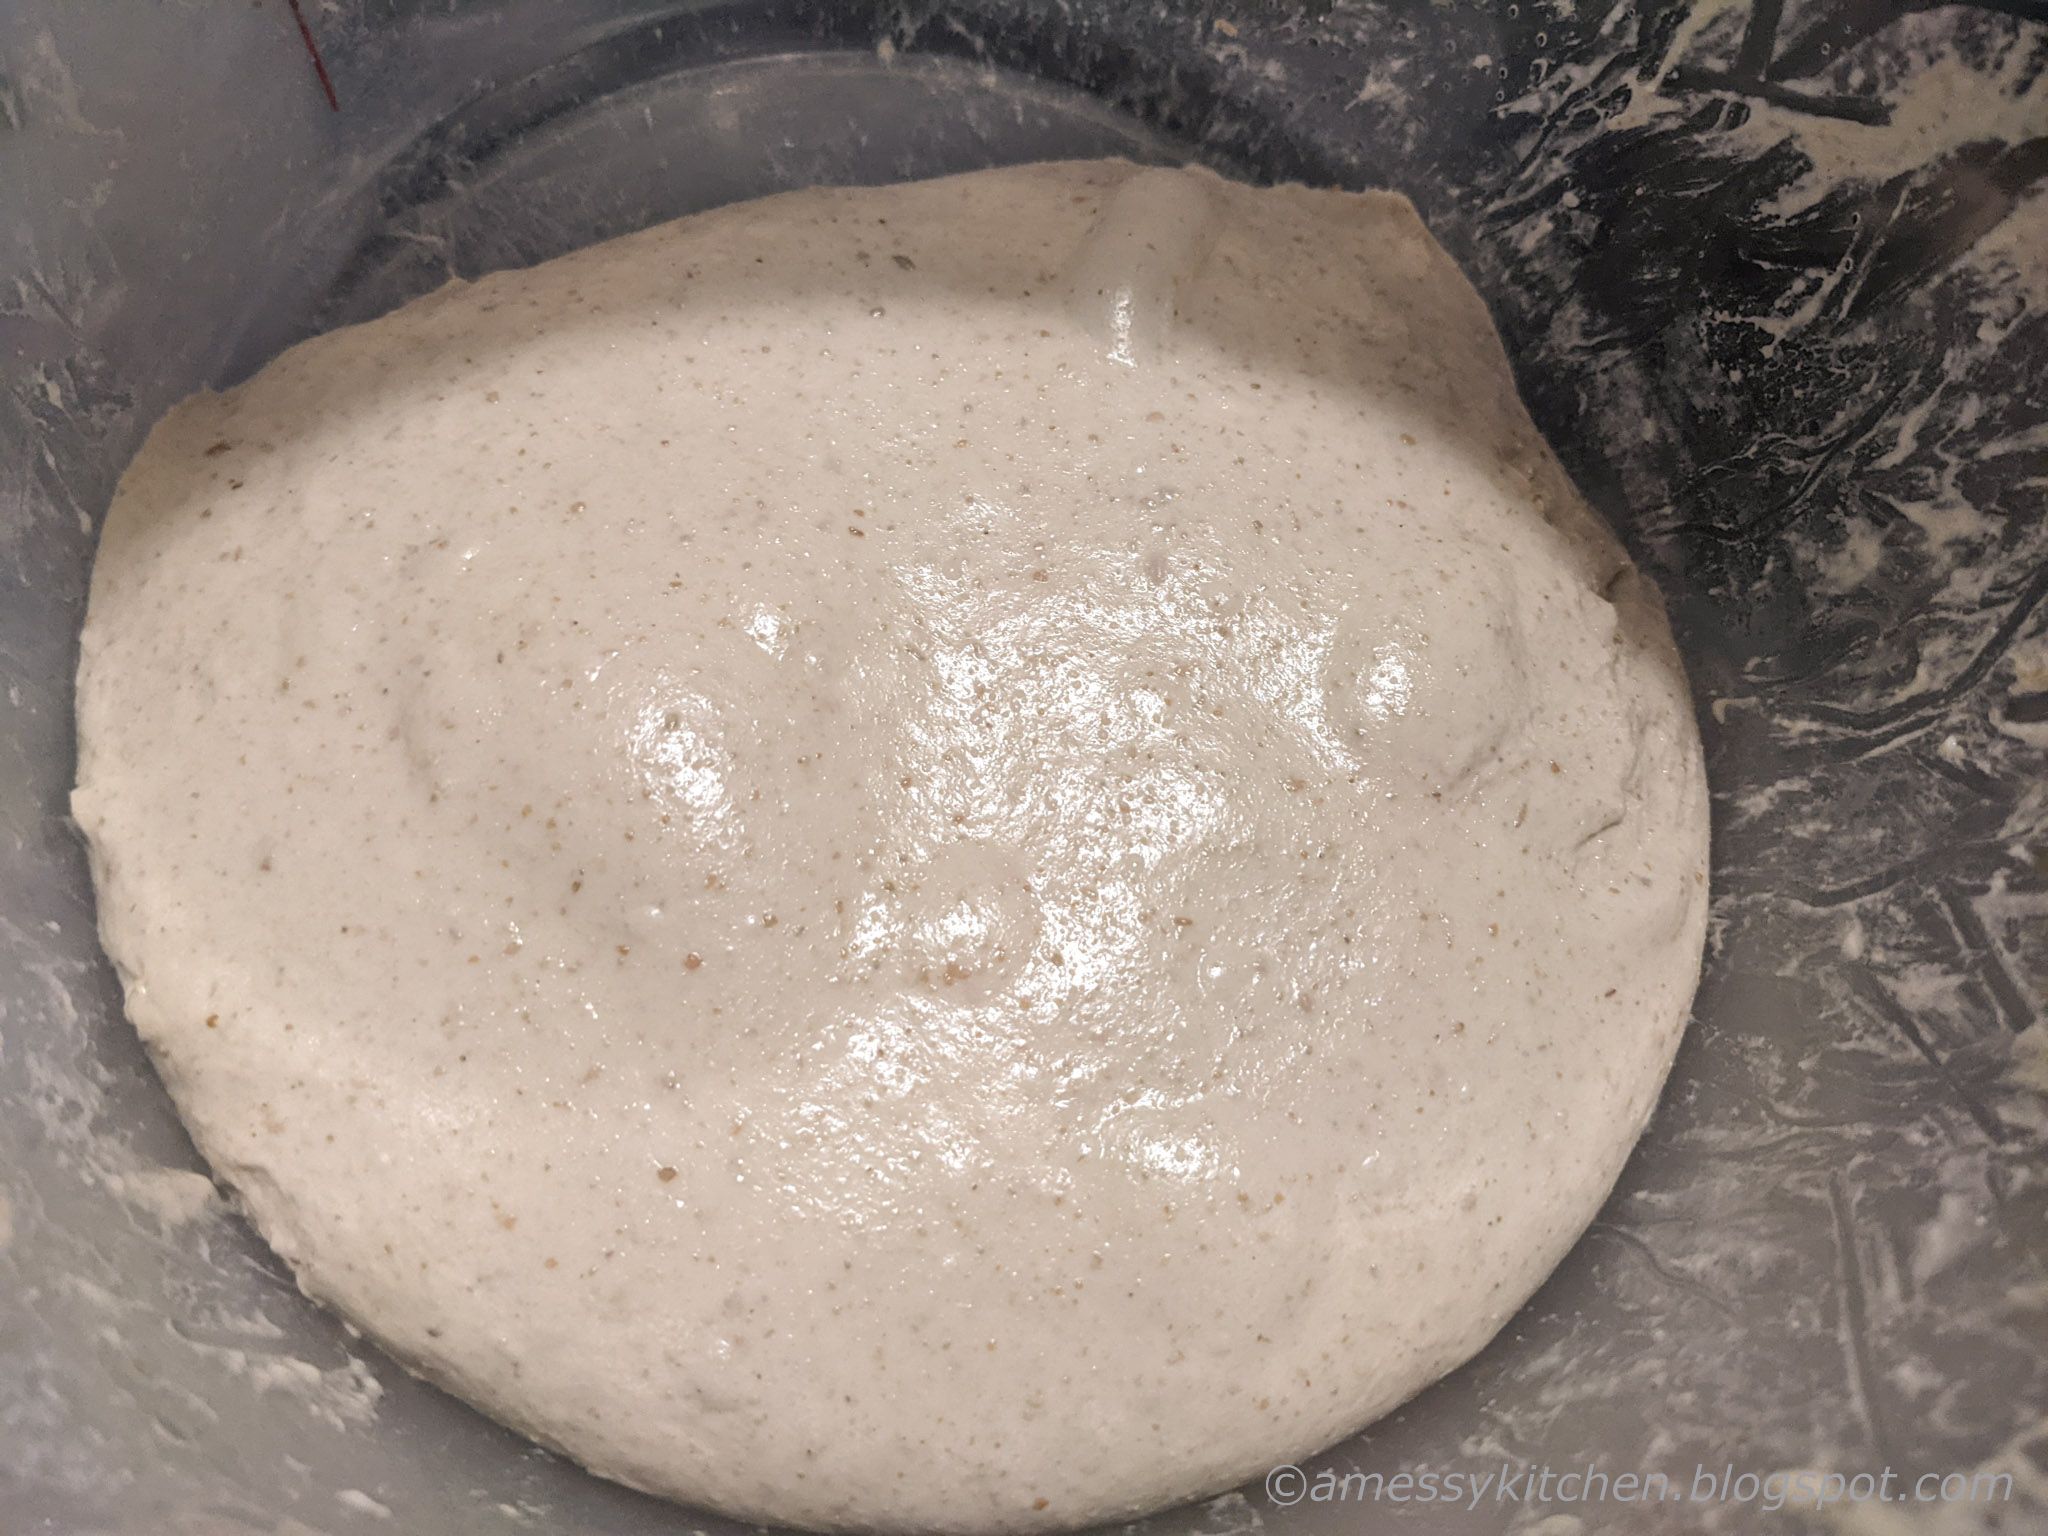
Transfer the dough to a floured surface and shape into a boule. Place in a lined and floured banneton basket. Cover, and allow dough to proof for 2-3 hours at warm room temperature. (I left my dough in the bucket overnight in the fridge with the intention of forming the next day.)
Cover tightly and place basket in the refrigerator to cold ferment 8-10 hours (or longer if it works better with your schedule) (This dough very easily conformed to my loose schedule of "when it looks right".)
Day 2 – Form the Knot and Bake
Remove the dough from the refrigerator 1-2 hours before you plan to bake to allow it to warm up to room temperature.

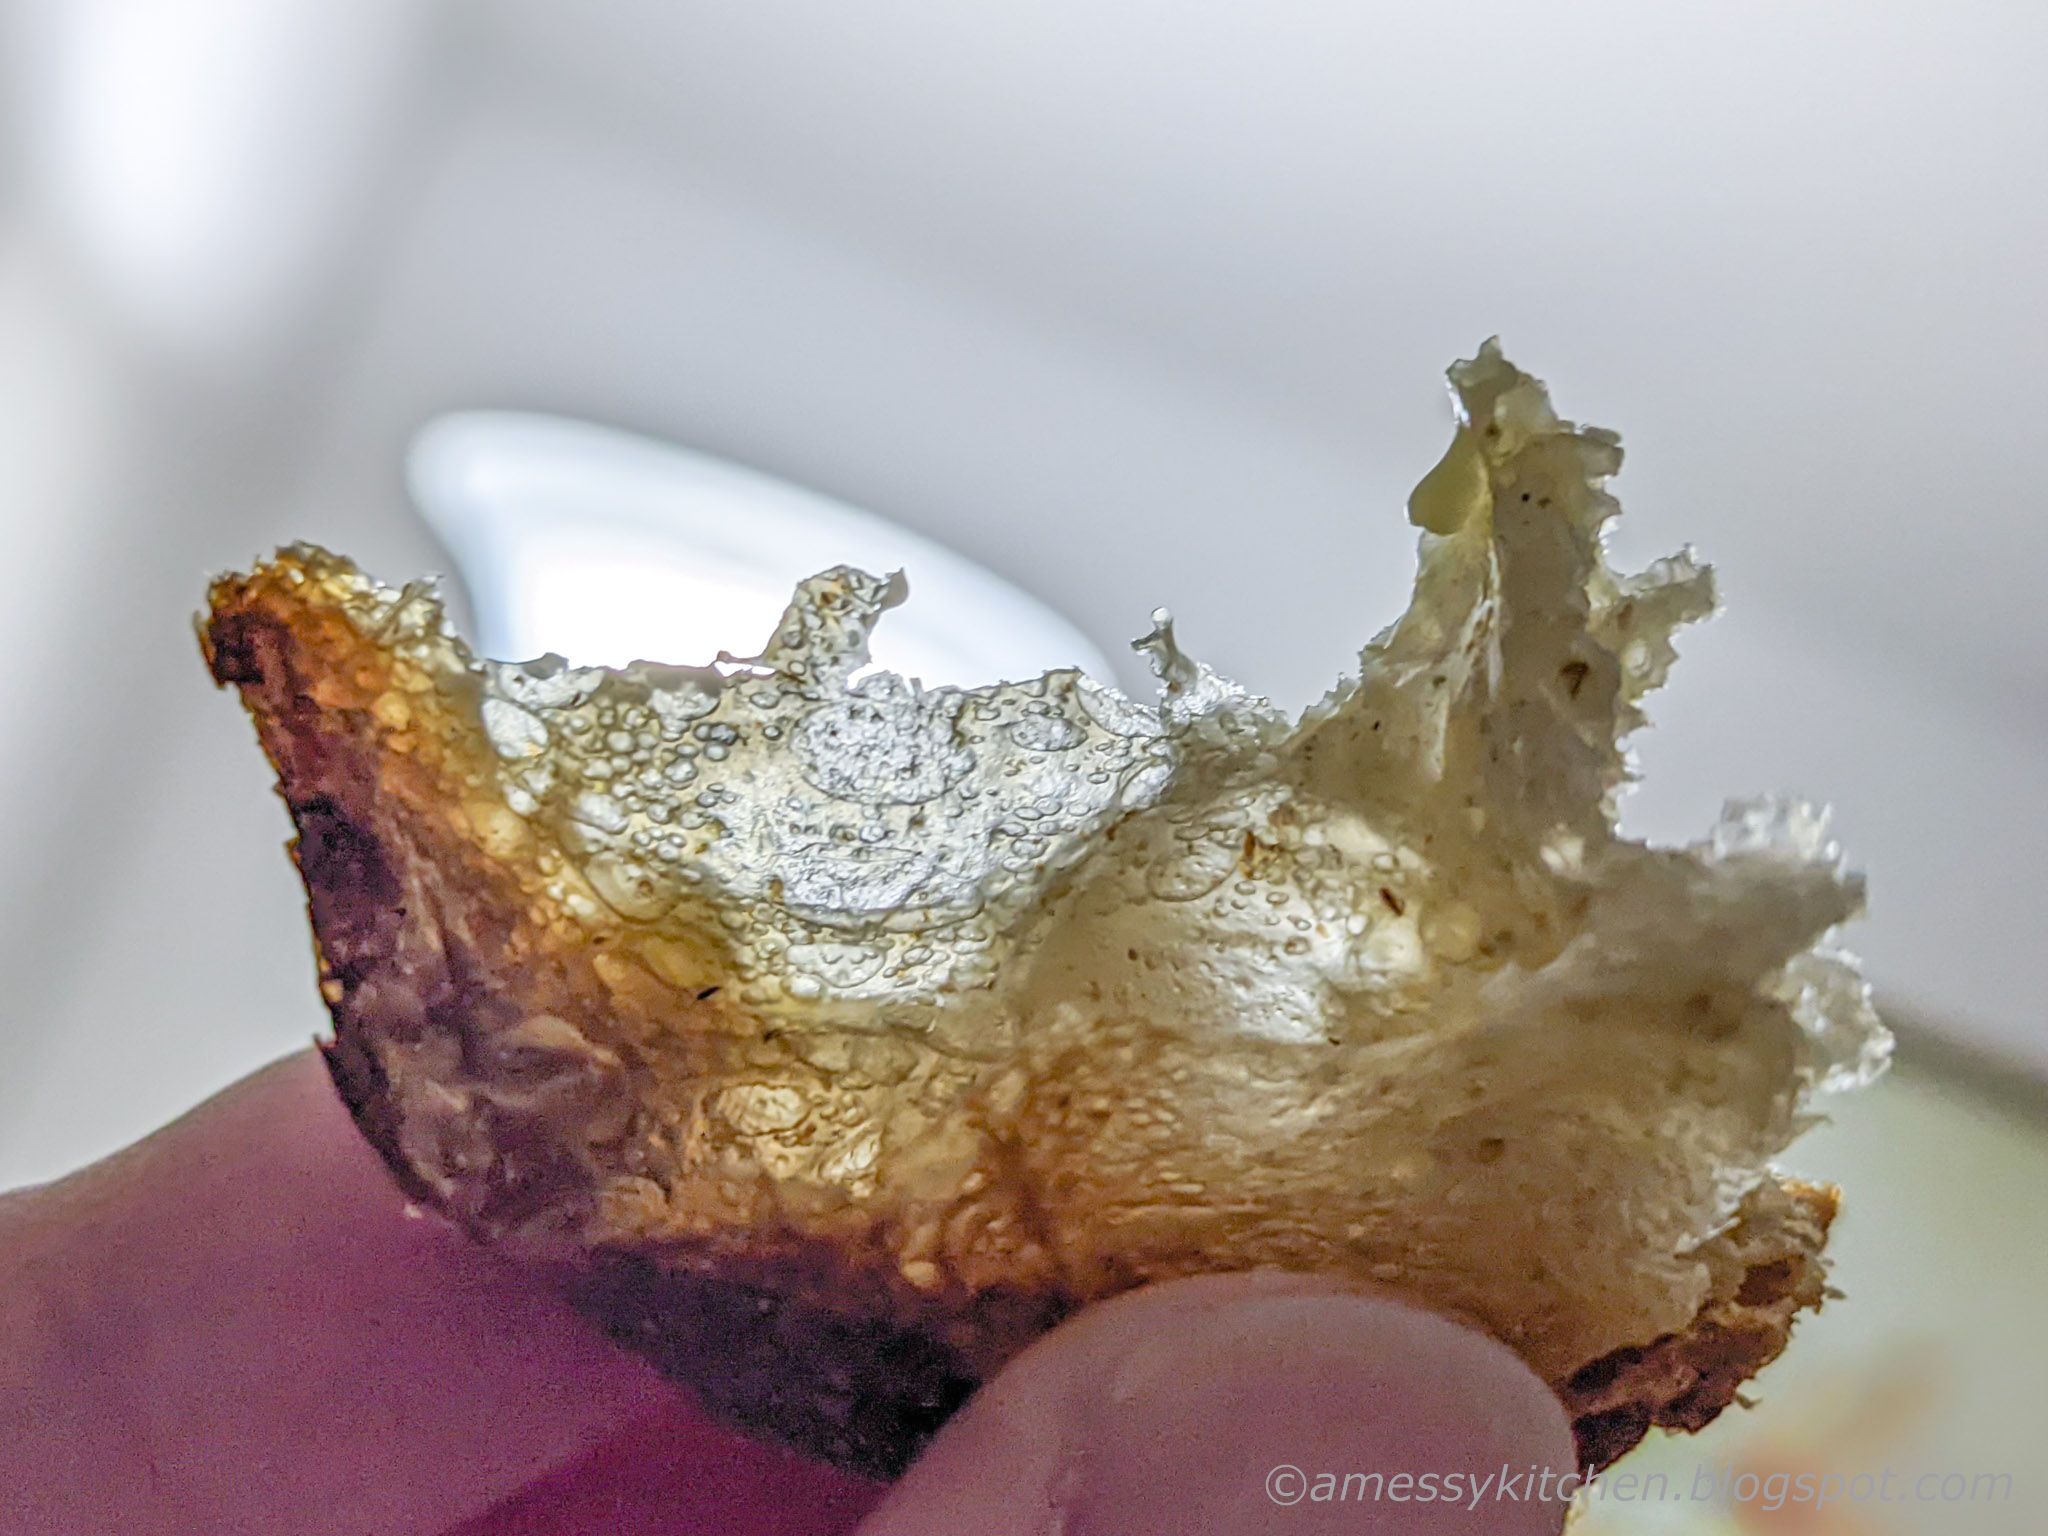
For my day two process, I transferred the dough to a lightly oiled square baking dish and continued to do coil folds as it warmed up. Once it was fully room temperature, I let it rise, covered, until more than doubled in volume. I turned out the dough onto a floured counter and carefully gathered the edges in toward the center to form a ball, trying not to deflate the dough too much. Then I flipped the dough over and placed on lightly floured baking parchment, covered, and let rest for 20 minutes. After the rest I formed the topknot and immediately baked in a well pre-heated oven at 480ºF for 15 minutes, then turned down to 390ºF for another 50 minutes. It is important to bake this loaf very well to ensure the crust will be crispy, otherwise the hydration of the crumb will soften the crust while cooling. This is a loaf that definitely benefits from that mahogany colored, bien cuit crust.
Preheat the oven to 480ºF with a baking steel/stone, or 500ºF with a Dutch Oven, bread cloche, or cast-iron pot on the next to lowest rack. If using a baking stone or steel, place a steam pan on the lowest rack.
Turn the dough out onto a floured surface, seam-side down. Grab the very top of the dough with your fingers. While pinching it, pull it up as high as you can and tie into a knot. Allow the dough to settle back down. (Alternately, you can twist to leave a ball of dough at the top and then tuck it back down into the center.)
Using a couple of bench scrapers, or your hands, carefully transfer the loaf to a piece of parchment. Score the loaf, if desired.
Transfer the loaf (on its parchment) to the preheated baking vessel (or stone) and bake for 10 minutes. If using a baking steel or stone, add a cup of ice cubes to the steam pan immediately after placing the loaf onto the steel. (I did throw some steam in when I placed my loaf on the baking stone.)
Reduce the temperature to 475º, remove the lid of the baking vessel, and bake the loaf for 15 minutes (or longer) until you have a dark, blistery crust.
Remove the loaf to a wire rack to cool before slicing.
 |
| Gluten at high hydration is a beautiful thing... |
The rest of the Bread Baking Babes
- Blog from OUR Kitchen – Elizabeth
- Judy’s Gross Eats – Judy
- My Diverse Kitchen - Aparna
- Bread Experience - Cathy
- Thyme for Cooking - Katie
- My Kitchen in Half Cups - Tanna
- Feeding My Enthusiasms - Elle
- Karen's Kitchen Stories - Karen

Your crumb is amazing. I probably should have waited longer before baking. And durum! How interesting!
ReplyDeleteWow! You got tremendous oven spring and your crumb looks so good. High hydration is a beautiful thing. Love that shot!
ReplyDeleteIt looks so good, Kelly! The crust is a stunningly beautiful colour and wow, what a great looking crumb.
ReplyDeleteHa. I thought I had managed to get close to 100% hydration, but I was clearly arithmetically challenged. It was only around 83%.... Next time, I'll add more water. And hope there are no explosions.